Google maps 100% page speed guide

Lightning-fast maps in short
Google maps unfortunately has little respect for your Lighthouse score. An iFrame, various JavaScript files and StyleSheets are injected by Google, all blocking the page rendering of the page.
Unfortunately, you have no control over what Google maps injects into your page. To keep your pagescore you need ton make sure that Google will not load the map until your browser has finished rendering and painting the most important content of your page.
The best way to embed Google maps and still achieving a 100% page speed insights and lighthouse score is by using a placeholder image and replacing it only when a visitor interacts with the map.
We will show you how that is done!
Impact of Google maps on the Lighthouse score
There a re lots of reasons to embed 'Google maps' map on your page. Its great for showing the location of your comany for example.
But there is a catch. Google maps is not as fast as you would expect from a Google service. In fact, Google maps on your page is quite a pagespeed drain.
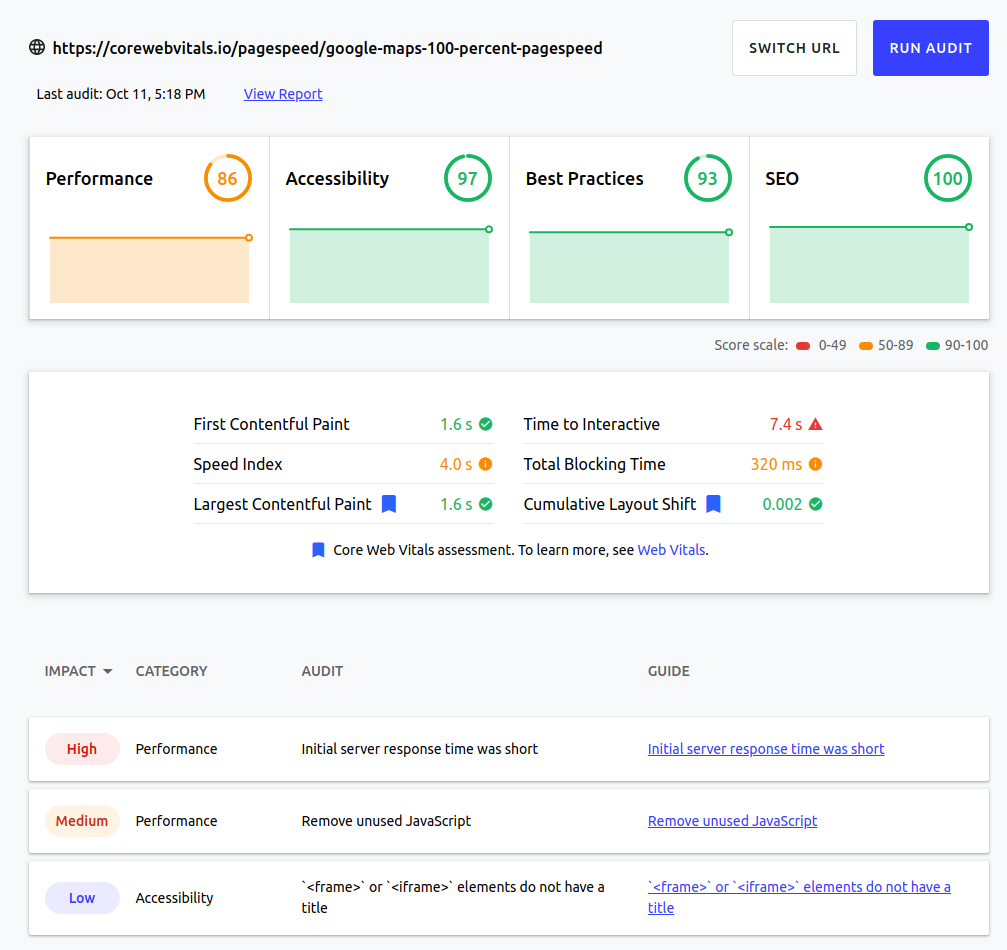
It costs 14% of my perfect 100% page speed score. It does this with my Google lighthouse statistics
- First contentful paint + 0.8 sec . The first paint runs almost a second later because Google maps interferes with the loading the page.
- Speed index + 3.1 sec Speed index tripled due to map rendering and mail thread blocking
- Largest contentful paint + 0.8 sec. The largest contentful paint is delayed by .8 seconds, just like the first contentful paint.
- Time to interactive + 6.5sec . Because Google maps relies heavily on javascript that all has to be executed, it takes more than 6 seconds to interact with the page.
- Total blocking time + 320ms . Google maps blocks the main thread with 320ms. That's exactly what we don't want.
- Remove unused JavaScript warning . To top it off, you get another warning that you are not using large parts of the Google Maps javascript. Try to explain that to a customer.

Your first thought might be to load the maps 'lazy' with the iframe attribute loading="lazy" . Unfortunately, that often makes little sense. iFrames deferred via loading = "lazy" are still downloaded and executed early by browsers. So we need to come up with something smarter.
Step 1 - Static maps
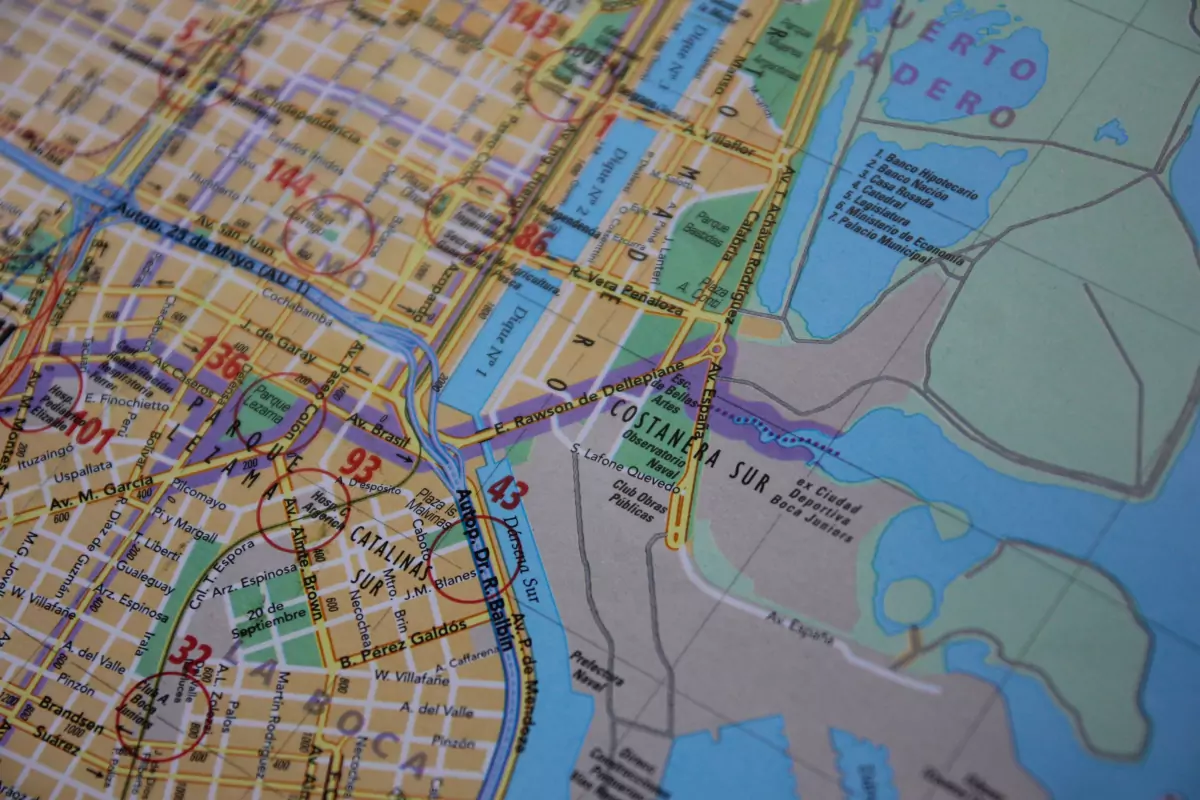
The easiest option is to use a static map. This means that instead of an interactive map, you use only an image of the map. The advantage of this is that an image loads much faster. The disadvantage is that you cannot interact with an image. So you cannot zoom in, scroll or navigate.
We will start with a static map. Later we can convert this static map into an interactive map that does not interfere with the pagespeed.
There are several ways to place a static maps on your page. The are tools that will hep you do that like Static Map Maker, but you need an API key. I will show you how to download a static map image by hand.
1 - place the maps on your page.
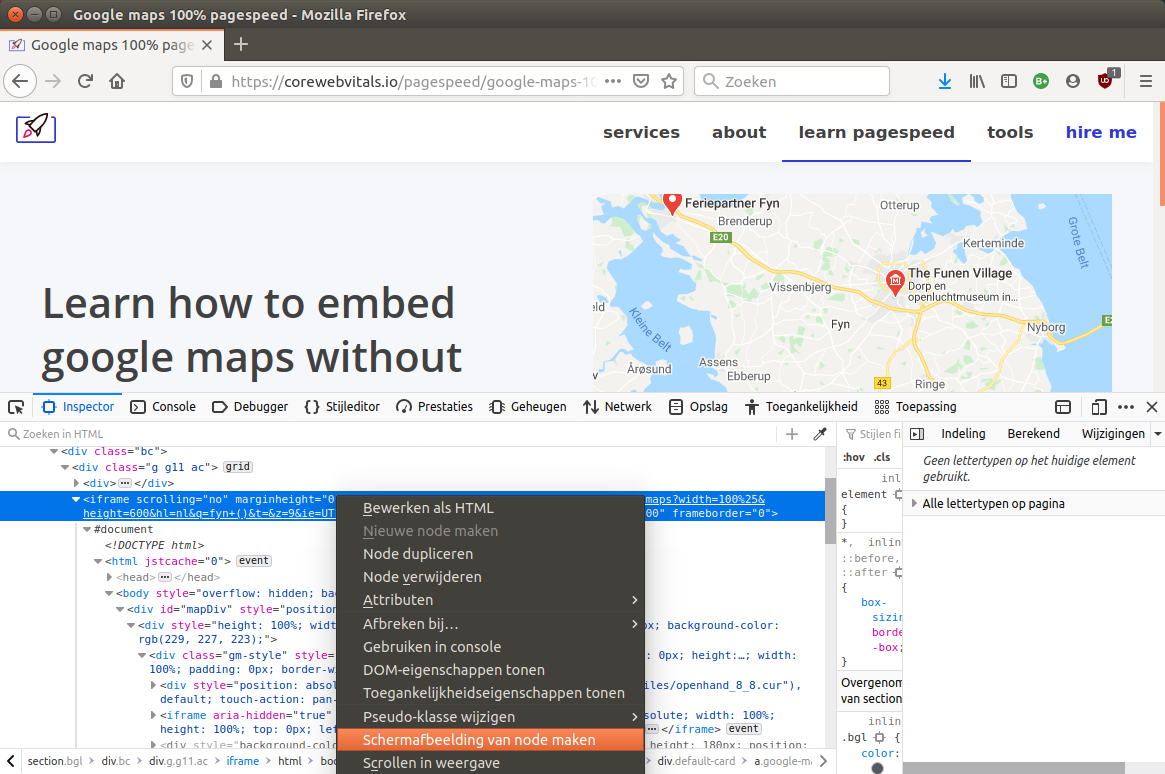
Place the map on your page. Go to Google maps, find a location and click share > embed this map. Copy the code and paste it on your page. Now right click on the page and select 'inspect element'. You will now see the element inspector of the 'dev console' of your browser. Now find the iframe code, right click on it and select 'capture node screenshot'.

2. Convert the static folder to WebP format.
The map image you just downloaded is in the png format. Because we are going for page speed, we will use the much faster WebP format. You can convert your image online at ezgif or you can converert it yourself with the tool cwebp: cwebp -q 60 image.png -o image.webp.
Step 2 - Convert the static map image to a interactive map
The static map ensures that no page speed is lost during page load. At page load this means we do not have an interactive Google map yet. At some point after pageload we will replace the static mas in the background with an interactive map. We will do this after the page has been rendered and painted. This can be done in 2 ways. The first way to replace the static map as soon as you hover the mouse over it. The second is to replace the static maps once the browser is idle.
3. Place the static maps image in a special 'placeholder'
Since we want our map to look good on both mobile and desktop, we will use this CSS trick where the proportions of the map are always correct regardless of the visitors screen size. We now add a data-src attribute to the container that we will alter use as the source url for the google map.
First place the maps container on the page:<div data-src="https://maps.google.com/mapsq=fyn+()&z=9&output=embed" id="mymap"></div>
Add some styling in your stylesheet. As you can see we use the static map image as a background image and apply a 76.25% padding at the bottom for a 16: 9 map format. The final map will have an absolute position over the entire width and height of the static map.
#mymap{
    background: url(/image.webp);
    background-size: cover;
    position: relative;
    overflow: hidden;
    padding-top: 76.25%;
}
#mymap iframe {
    position: absolute;
    top: 0;
    left: 0;
    width: 100%;
    height: 100%;
    border: 0;
}
4. Load the interactive map during the first interaction
This is where the magic happens. Without this little piece of JavaScript, the map is just a static image. This JavaScript adds (and removes) an eventlistner to the placeholder container and waits for the 'mouseover' event (when you hover your mouse over the static map) to inject the interactive map in the container.
var map = document.getElementById ('mymap');
var maplistner = function (e) {
    var frame = document.createElement ('iframe');
    frame.src = this.getAttribute ('data-src');
    map.appendChild (frame);
    map.removeEventListener ("mouseover", maplistner);
};
map.addEventListener ('mouseover', maplistner);
5. Pre-load the background image (optional)
If the Google map is immediately visible in the viewport, it is often a smart idea to 'preload' the background map image. Use this code to preload the static maps image <link rel="preload" href="/image.webp" as="image" type="image/webp" crossorigin> and place this as early as possible in the <head>of your page. In this example case, preloading the placeholder image speeds up the LCP by almost a second.
Step 2b - Replace the static maps image automatically
When there is a high chance that the visitor will interact with the map it might be a good idea not to wait for the mouseover event. As soon as the browser is idle start injecting the Map into the page. The process is more or less the same as above. You can even combine both.
4b - load the interactive map automatically
We will use a of the 'load event' here. The load event is a signal that your browser sends out as soon as the page has finished loading. Then we convert the static maps to the interactive map!
window.addEventListener('load',
    function(e) {
        var map = document.getElementById ('mymap');
        var frame = document.createElement ('iframe');
        frame.src = map.getAttribute ('data-src');
        map.appendChild (frame);
});
The result
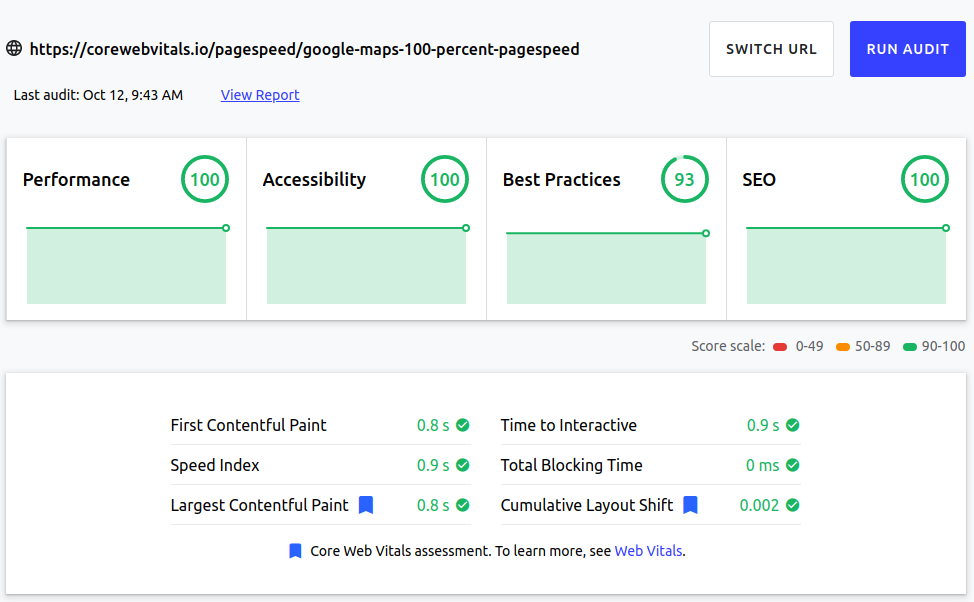
If you apply 1 of both techniques you will notice that the page loads with a 100% lighthouse score and a 100% page speed insight score while retaining all the functionality of Google Maps!

Good luck making Google maps faster. Do you need help? Then contact me!
Need your site lightning fast?
Join 500+ sites that now load faster and excel in Core Web Vitals.
- Fast on 1 or 2 sprints.
- 17+ years experience & over 500 fast sites
- Get fast and stay fast!

